Saturday, February 6, 2016

The best 68¢ I have spent in a long time

In March of 2015, I was given an Arduino starter kit by my son-in-law as a gift for helping him build a new PC.  Included in the kit was a 16 character by 2 line LCD with a Hitachi parallel interface.  I quickly discovered what a pain it was to connect to the Arduino, mostly due to the considerable number of connections necessary.

Even using the 4 bit parallel mode, +5V, GND, and 6 control pins on the Arduino are needed to control the display.  In addition to the Arduino connections, another 8 or so jumpers are needed to ground other pins, provide power for the backlight, and control the display contrast. Every time I wanted to use the display, I had to reconnect the tangled web of jumpers just to use the damn thing.

A few weeks later I purchased a 20 character by 4 line LCD (also equipped with a Hitachi parallel interface) but with a I2C daughterboard soldered on the backside.  At the time, I had NO experience with I2C devices, but due to the wonders of the internet, it didn't take long to find and learn how to use F Malpartida's wonderful and flexible driver library for I2C enabled LCD displays.

I was overjoyed to discover how much simpler it was to connect to the Arduino! +5V, GND, and 2 I2C pins; that's all it takes.  No more rat's nest of jumpers, just 4 simple connections.  The I2C board on the back of the display even includes a pot for adjusting the display contrast.  A far easier interface, and a 4x20 character display to boot.   At this point, the 16x2 LCD got set aside.


Fast forward to about six months ago; I was perusing AliExpress (one of my favorite cheap Chinese Arduino accessory websites) and stumbled across the very same Hitachi parallel to I2C daughterboard that was fastened to my 2004 LCD, for just 68¢, including shipping!

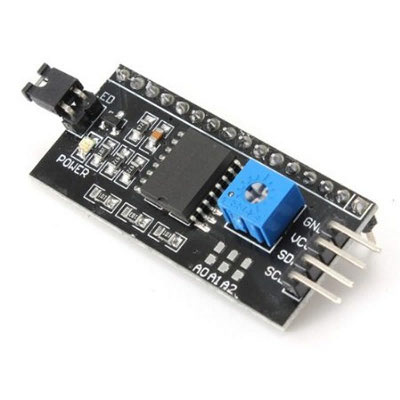
Three weeks later, after receiving it in the mail.  I soldered it to my 1602 LCD, and voilĂ !; I can now connect the 1602 LCD to the Arduino via I2C using just 4 wires, instead of the confusing and complicated parallel interface it came equipped with.

The best 68¢ I have spent in a long time.

Link to the adapter:
http://www.aliexpress.com/w/wholesale-i2c-lcd-adapter.html

Link to the F Malpartida I2C LCD library:
https://bitbucket.org/fmalpartida/new-liquidcrystal/overview

Friday, June 5, 2015

Driving multiple displays with the Arduino

Over the four months or so since I got my Arduino, I have purchased several different small displays that utilize various hardware control methods: A 16x2 character LCD module that uses the Hitachi HD44780 parallel interface, a 20x4 character LCD module with an I2C board connected to its internal HD44780 interface, a Nokia 5110 84x48 LCD dot-matrix display module, and a tiny 0.96 inch 128x64 OLED display module. Both the Nokia and the OLED displays use the SPI interface. I have used these displays individually in any number or projects I have built, but I often wondered if they could all be connected and controlled at once.

One of the greatest things to me about the Arduino is its ability to accept input and provide output to an amazing variety of devices. The Uno, equipped with 14 digital I/O pins and six analog pins, make connecting with almost anything you can imagine extremely simple, and often with little or no support hardware. In addition, the SPI.h and wire.h libraries make connecting and communicating with SPI and I2C devices even easier.

I am fascinated with all the gadgets that can be interfaced with the Arduino, and when I purchased a tiny I2C Temperature and Pressure sensor, I thought it would be a perfect opportunity to see if all my displays could be connected simultaneously and be used to display atmospheric data measured by the module.
Since the larger of my two LCD character based displays is controlled via I2C, connecting it with the temp/pressure module was a snap. No additional pins beyond the four I already had connected to the sensor were needed, since I2C devices communicate on a serial bus, each device with its own address.

The two SPI displays, the Nokia and OLED used an additional five pins, three pins common between the two displays, and one pin each to control each individual display.

The parallel interface equipped 16x2 display required an additional six pins along with a separate solderless breadboard to accommodate the pins that needed to be held high or low, provide a connection for the 10k pot used to control contrast, and power the display's backlight.

All told, fifteen of the Arduino's pins. Two for ground and +5V, two of the analog I/O pins for the I2C interface, and eleven of the digital I/O pins: five for the two SPI displays, and six for the parallel display. Not too terrible when you consider that there are five discrete devices being driven!

I had a lot of fun putting the project together, along with learning to use the U8glib graphic library to display the graphical pressure data on the two individual dot addressable displays. I'm not going to post the source code here, but if anyone is interested, leave a comment and I will be happy to provide it to you.


 Until next time, happy project building, and be sure to check out some of my other projects on my YouTube channel: My YouTube Channel